

Intuitive design is the key to high-quality data
July 22, 2026
This is the first in a multi-part series on all user flows in Willis eCOA. Click here to subscribe to our newsletter so you never miss out.
At its core, Willis eCOA is designed to make the most critical tasks effortless: creating a participant, starting a visit, and administering a scale.
Why is this so important? Because the more complex the software, the more likely the rater's attention is focused on fighting the platform rather than interacting with and observing the study participant.
Our goal was to make this workflow so intuitive that sites require virtually zero training to get started––and feedback from the clinic suggests we've succeeded.
Watch the short demo video below to see a site user seamlessly carry out a study visit, or scroll down for a more detailed step-by-step breakdown.
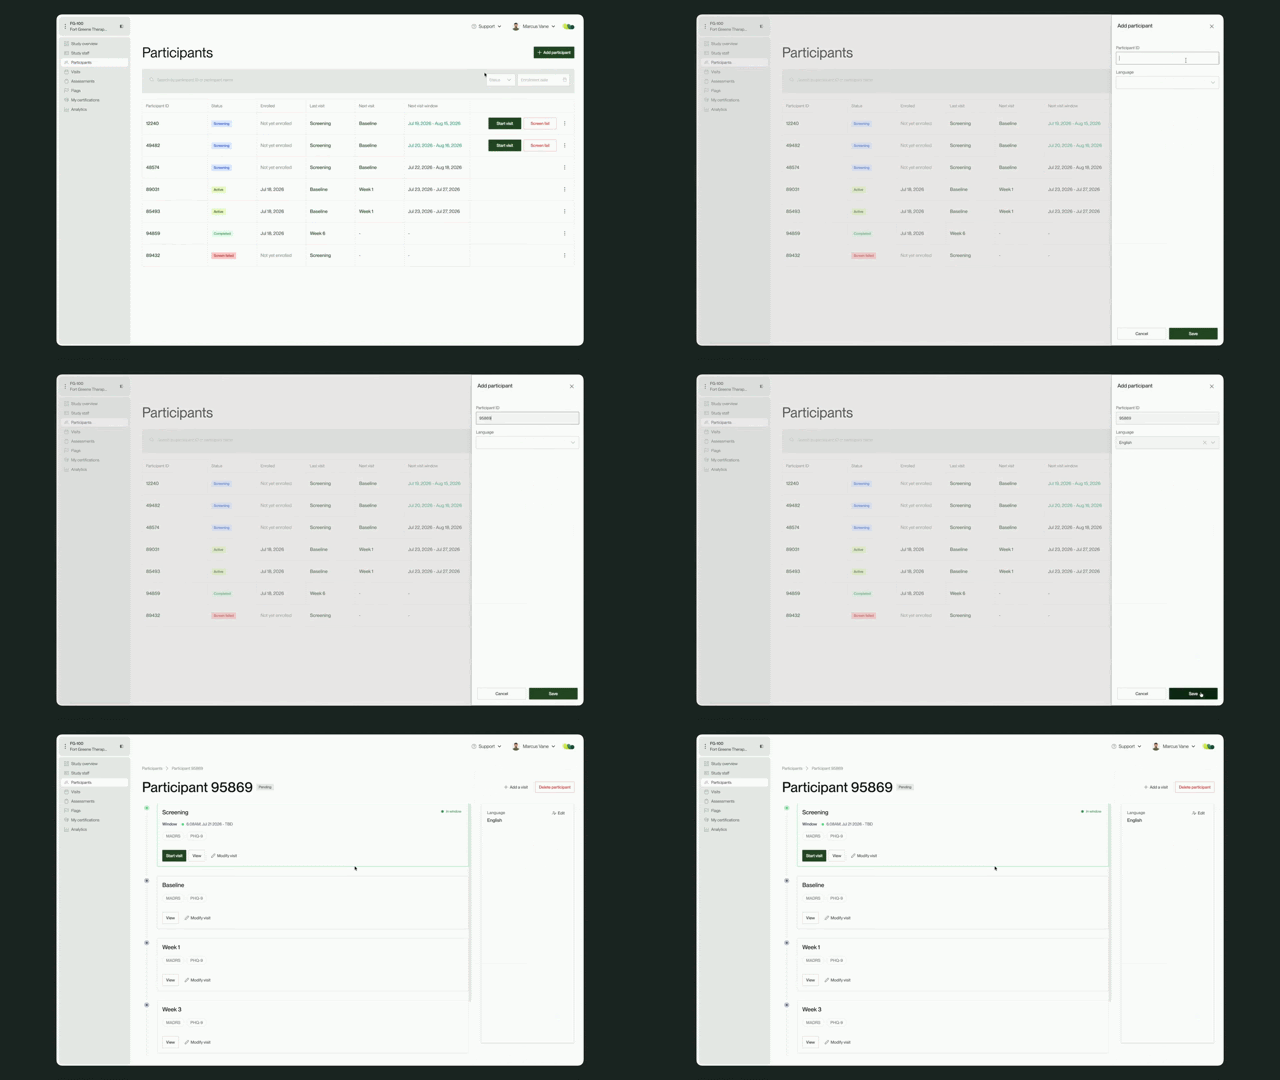
Step 1 - Creating a participant
To add a participant, sites simply navigate to the Participants page and hit 'Create'. At minimum, they'll need to provide (or select from an existing list) the participant ID. Depending on the study, they could be required to enter additional information, like the participant's preferred language. Instantly, the profile is generated, and the full visit schedule is populated and ready to go.
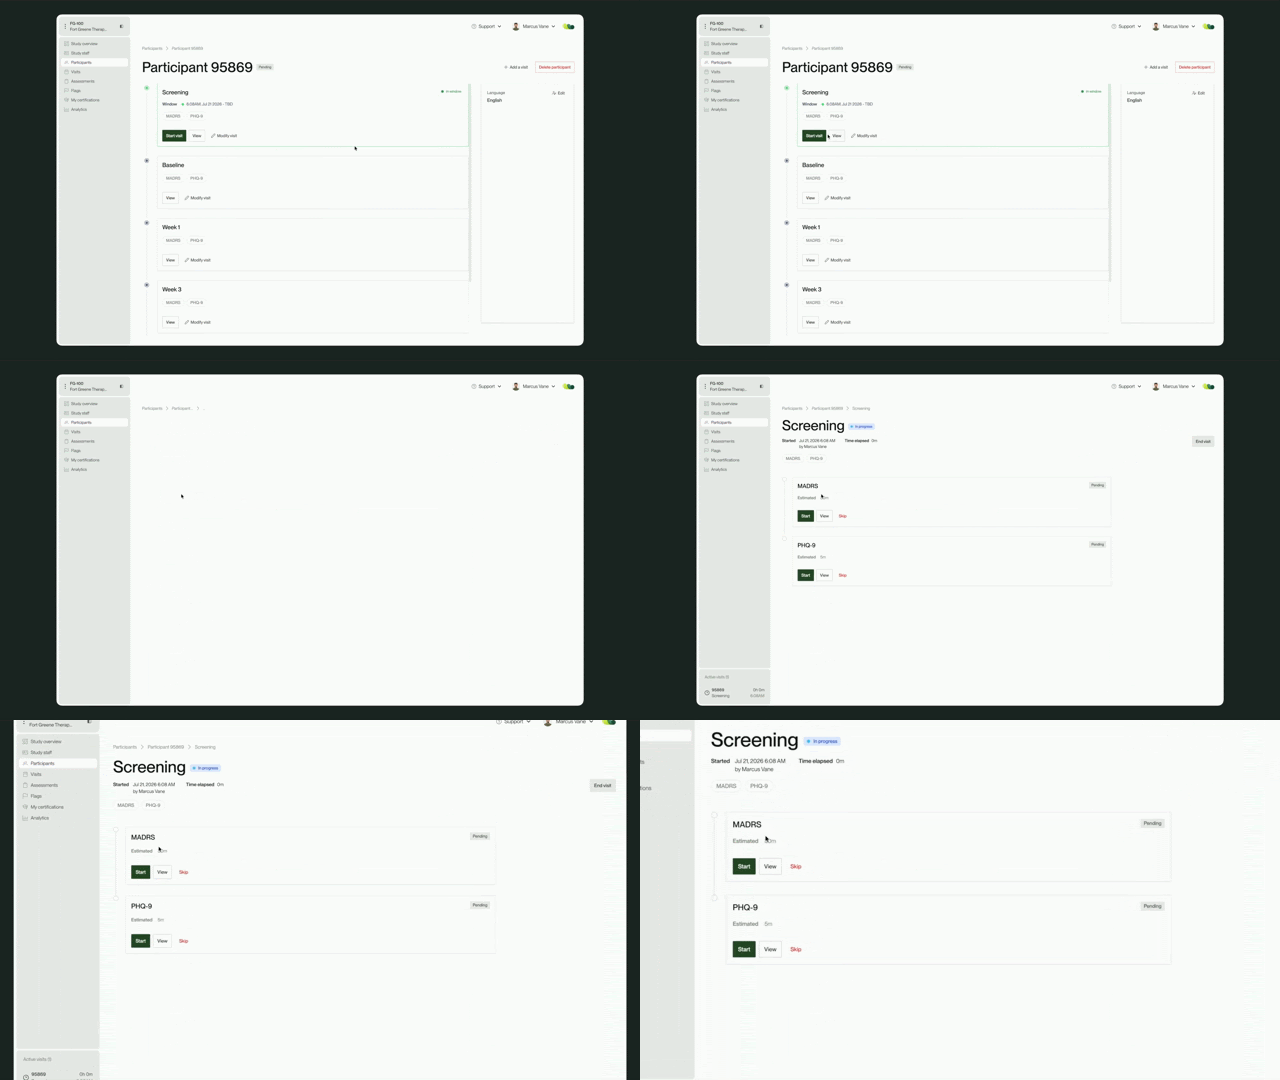
Step 2 - Starting a visit
Starting a visit takes a single click. Site staff are immediately shown the required scales for that visit, alongside estimated completion times. The example shown here just has a MADRS and a PHQ-9.
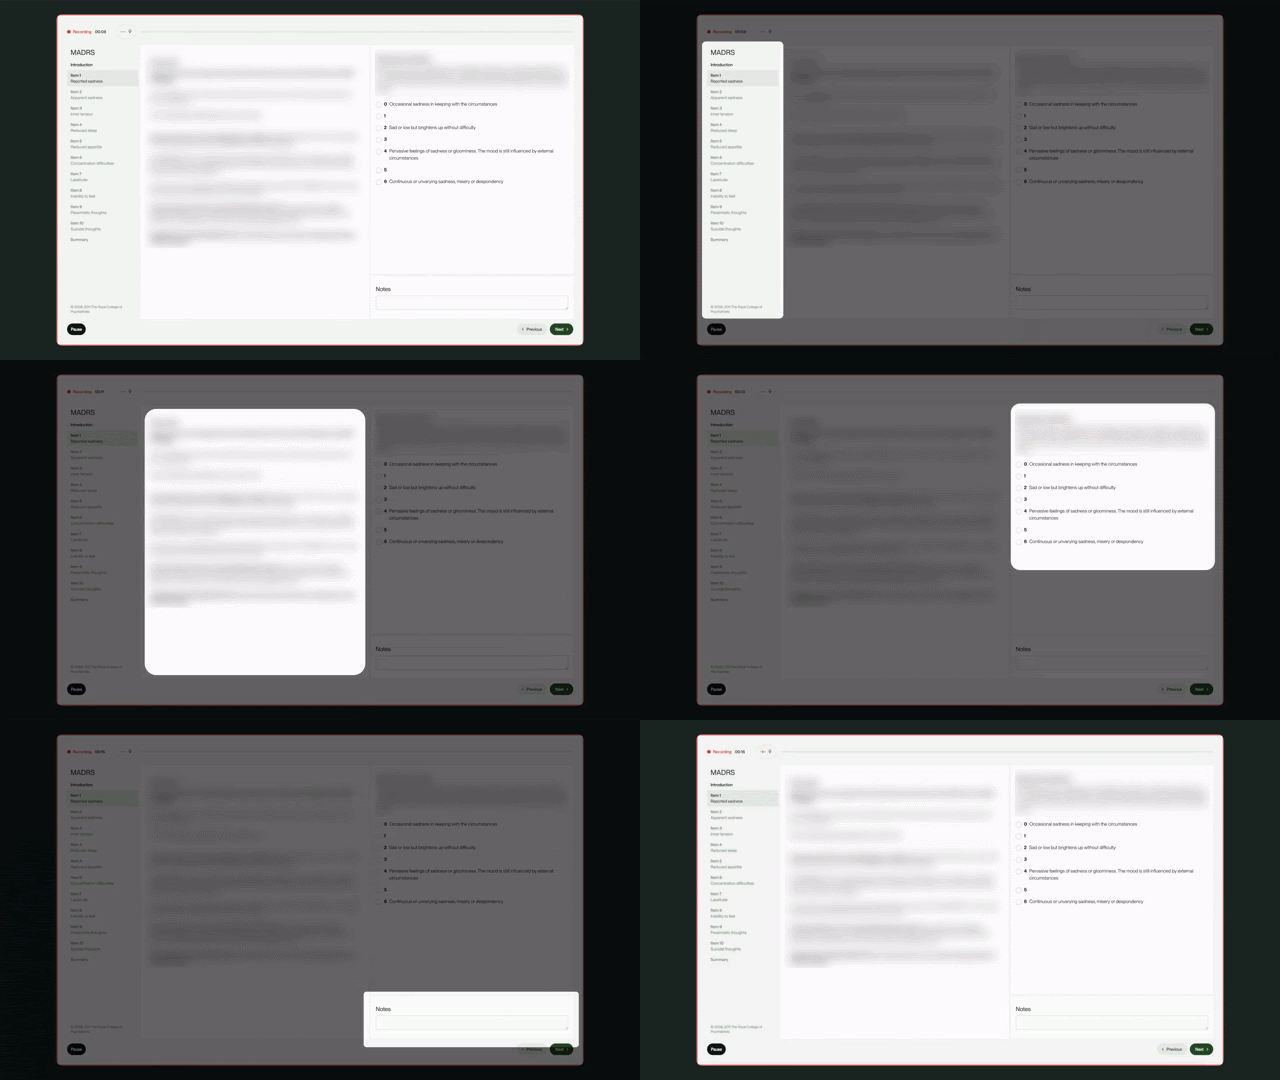
Step 3 - Administering a scale
For now, we'll just be going over a clinician-reported outcome measure as an example.
Every ClinRO is unique, but we do our best to enforce a standardized, predictable design language across all assessments to reduce cognitive load.
The navigation bar remains on the left, main content in the center, scoring on the top right, and rater notes on the bottom right. Note that the MADRS copy in this example is hidden due to license restrictions. If a recording is being collected, this is shown at the very top.
Every ClinRO ends with a summary page where the rater can review their scores, edit notes, and provide their eSignature to save. If the interview was being recorded, the upload happens automatically in the background––no manual upload step is needed.
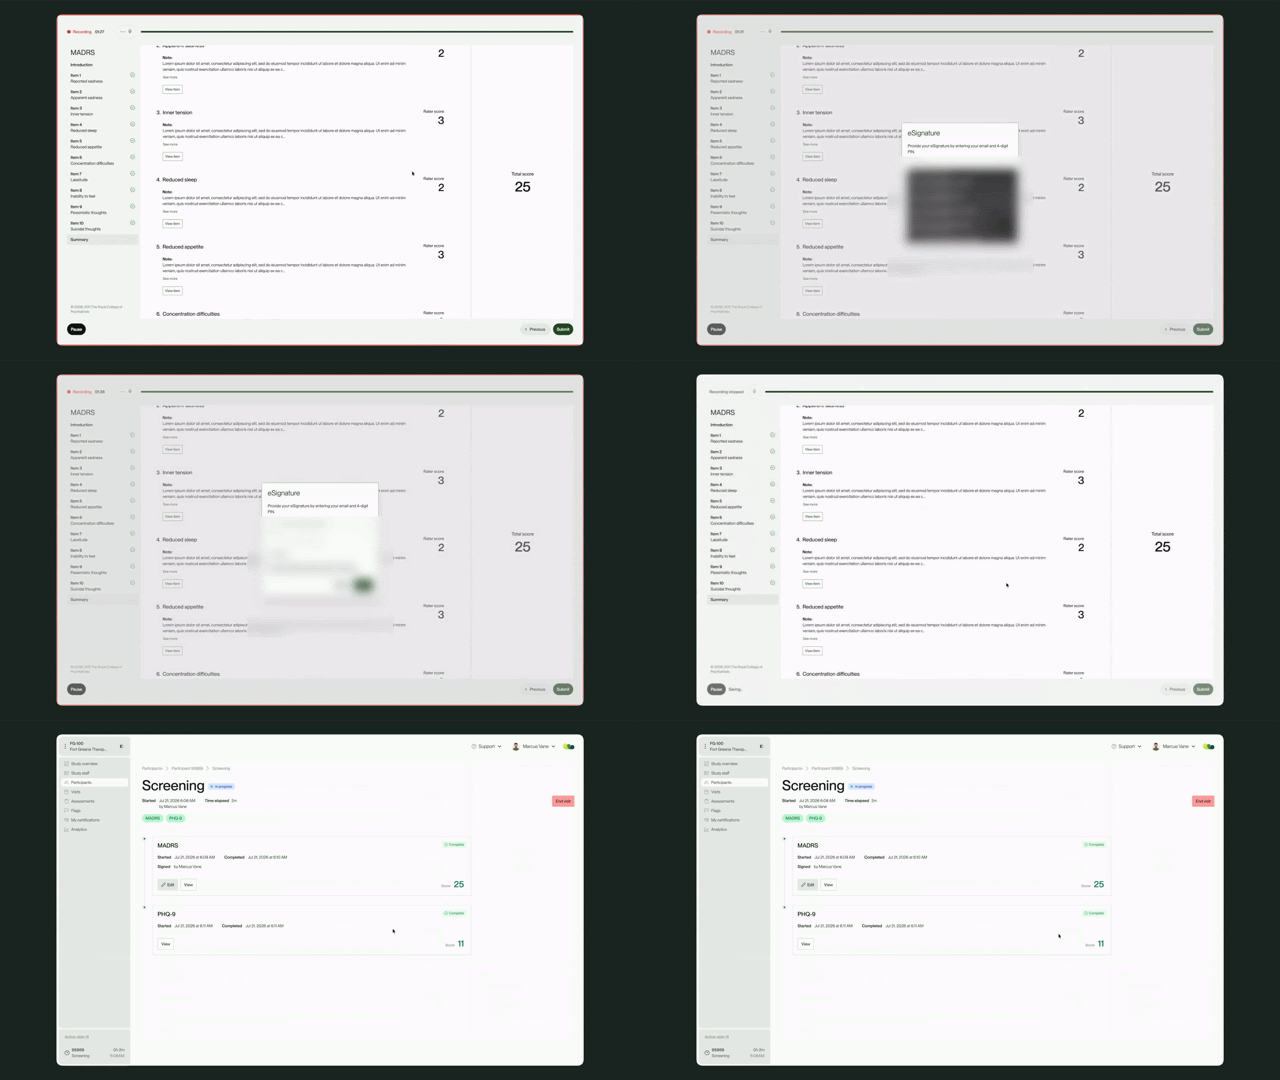
And with that, the scale is complete!
Step 4 - Closing out a visit
Once all COAs are administered, the site formally closes the visit. Upon closing, all submitted values are locked to ensure strict data integrity. Any subsequent changes would have to go through a Data Change Request process.
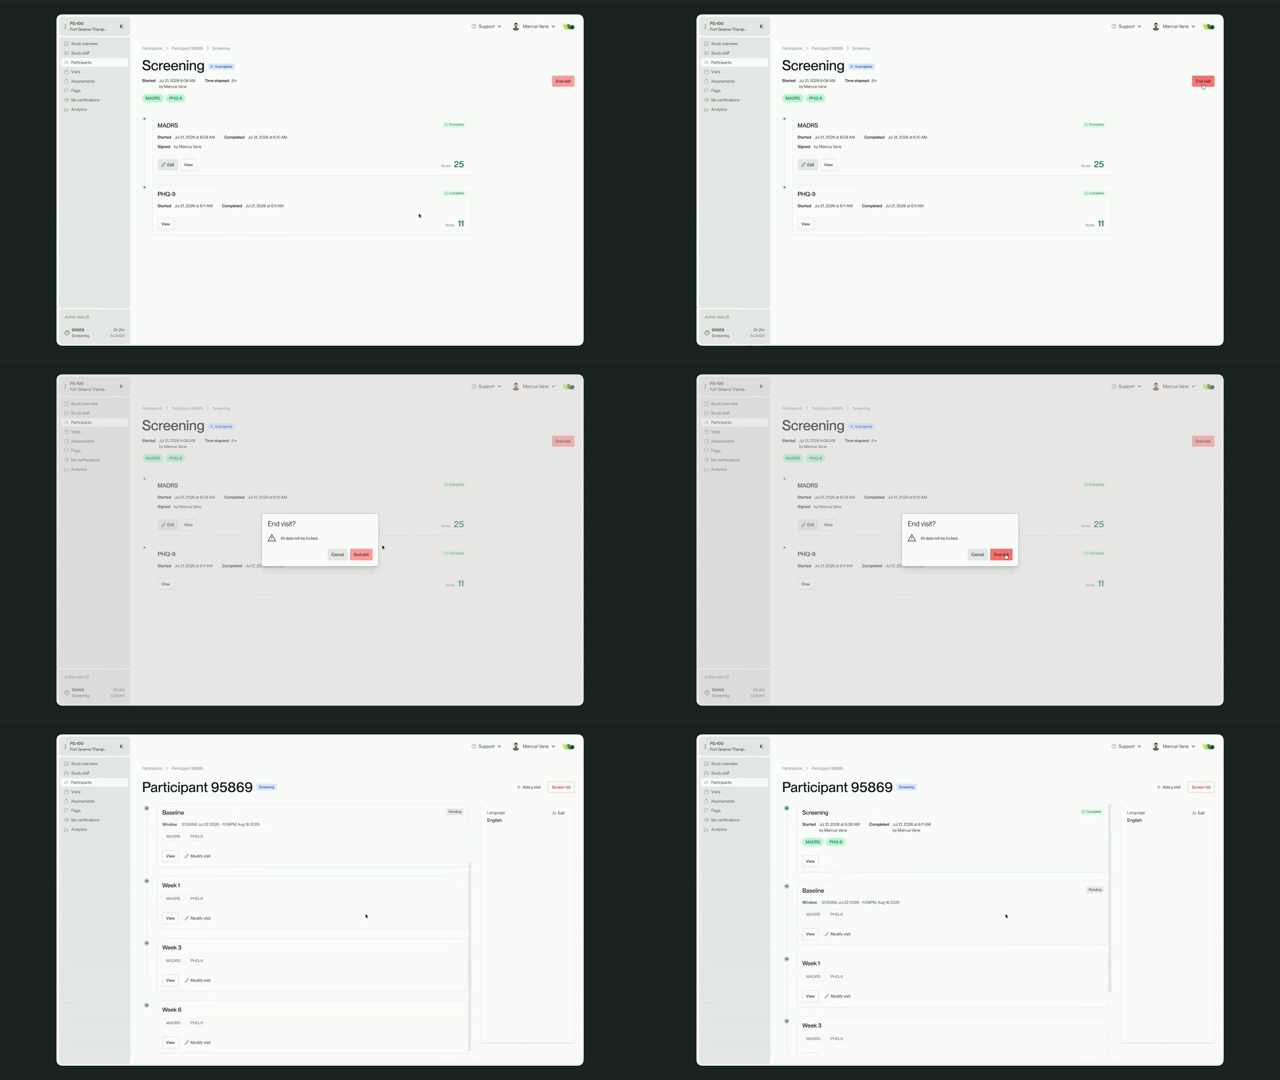
And that's all that's involved in carrying out a visit on Willis eCOA!